
To create a new scan:
- From the Scans Setup page, click Create New Scan in the top-right corner.
- Fill in the form fields described below.
- Click Create Scan to save. You will be returned to the scan list once it is created.
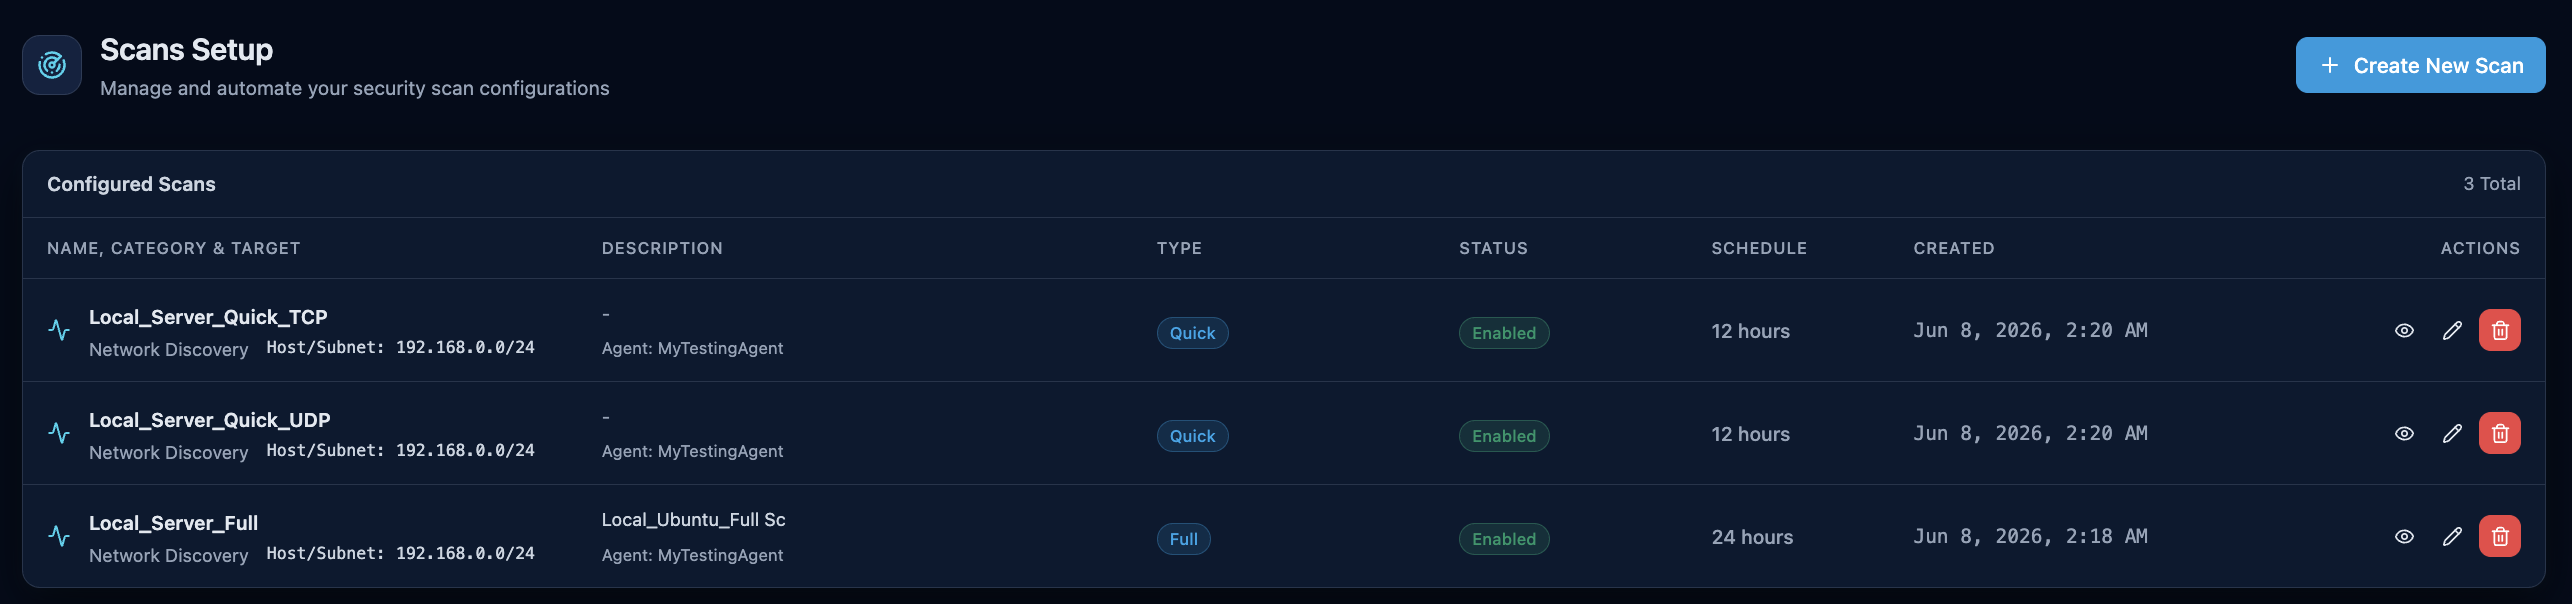 The Scans Setup page — your list of configured scans and the Create New Scan entry point.
1. Form Fields
Choose the scan intensity:
| Value | Description |
|---|---|
| Full | Performs a comprehensive port scan across all common ports for the target. No protocol selection required. It takes more time since it performs deep assessments. Well suited for periodic assessments. |
| Quick | Performs a faster, targeted scan. Requires selecting a specific protocol (see below). Best for frequent monitoring with lower overhead. |
2. Scan Name
A logical label for this scan (e.g., "Production Web Server — Full Scan"). This name appears in the scan list, dashboard widgets, reports, and CyfroAssistant responses.
3. Host or Subnet
The IP address or CIDR range to scan. Examples:
| Target | Example |
|---|---|
| Single host | 192.168.1.50/32 |
| Full subnet | 10.0.0.0/24 |
The Agent running the scan will direct its scan probes to this target. Ensure the target is reachable from the machines where your Agents are installed.
4. Protocol (Quick scans only)
Visible only when Type is set to Quick. Select the transport protocol to scan:
| Protocol | Use case |
|---|---|
| TCP | Standard web servers, SSH, databases — most services use TCP. |
| UDP | DNS, SNMP, syslog, and other UDP-based services. |
5. Agents
Select one or more CyfroAgents to run this scan. The scrollable list shows all Agents currently online in your Account Group. Use the Check all toggle to select every available Agent at once.
Assigning multiple Agents to a single scan is useful for:
- Scanning the same target from different network segments to detect firewall asymmetry.
- Providing redundancy if one Agent goes offline.
6. Interval
How often the scan runs automatically:
| Option | Interval |
|---|---|
| 1 hour | Every 60 minutes |
| 6 hours | Every 6 hours |
| 12 hours | Every 12 hours |
| 24 hours | Once per day |
Scans run on a recurring schedule starting from when they are created. There is no one-time or manual trigger option yet currently to schedule the scan and let the platform run it.
Note: In instances where the chosen file path/filesystem is large, the scans may take longer than the interval.
Editing Existing Scans
- From the Scans Setup page, click the pencil (edit) icon next to the scan you want to update.
- The edit form is pre-populated with the current values.
- Modify the fields as needed (all fields are editable, including the scan type, target, agents, and interval).
- Click Update Scan to save. You will be returned to the scan list on success.
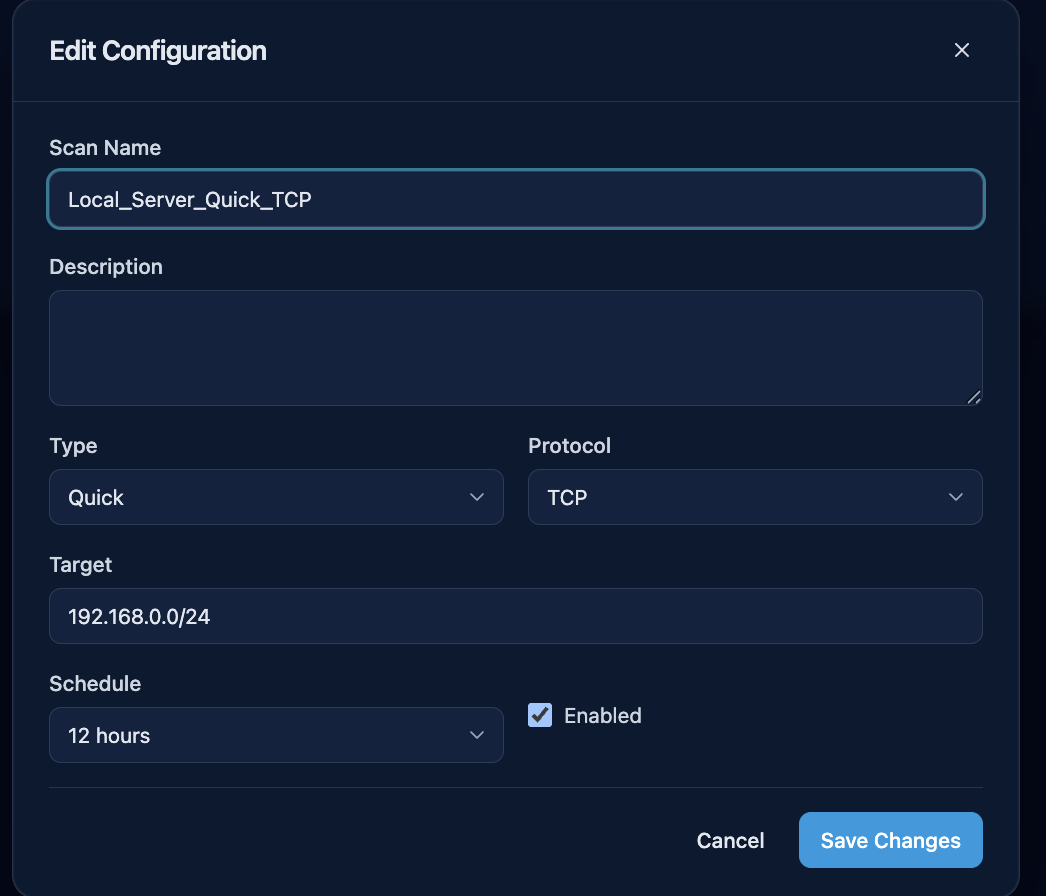 The edit dialog is pre-populated with the current values; every field is editable.
Note: Changing the Interval on an existing scan takes effect immediately — the next scheduled run will use the new interval.
System Default Scans
Scans marked with the System badge were auto-provisioned when your Account Group was created (a default port-scan probe). You can edit these scans to adjust the target, agents, or schedule, but you cannot delete them.